84-87 Fiero Rear Sway Bar Conversion
Parts Used:
|
|
1x Front Stabilizer Bar from an 87-99 GM H-body car (bonneville, olds 98) |
|
|
2x Stabilizer Bar frame mount brackets and bushings from the donor car |
|
|
2x End Link kit with a 1" spacer sleeve (you can cut to fit) |
|
|
4x 3/8" bolt, 1"-1.5" long |
|
|
4x 3/8" lock washer |
|
|
12x 3/8" flat washer (optional) |
|
|
4x 3/8" nut |
Basic Tools Needed:
|
|
3/8" Drill or equiv. |
|
|
Permanent marker or pencil |
|
|
Some kind of grinding tool, file, or cut-off wheel |
|
|
Center punch and hammer |
|
|
3/8" and 7/16" drill bits |
|
|
Hand tools to fit nuts and bolts used |
|
|
Tape measure or ruler |
|
|
Paint or spray undercoat |
Modifications needed for install:
You will need to drill four, 3/8" holes in the subframe to accommodate the sway bar-to-frame mounts. The best way to determine the location of these holes is to hold the sway bar, with the frame mounting brackets and bushings attached, in place and mark the holes as far rearward and outward as possible to allow frame clearance. NOTE: be sure that you will be able to get the bolts in these holes after you drill them (take care the holes are not too close to an adjacent support or wall). The H-body sway bar has a bend in the center which should face upwards to allow clearance for a jack to lift the car in the center of the rear subframe.
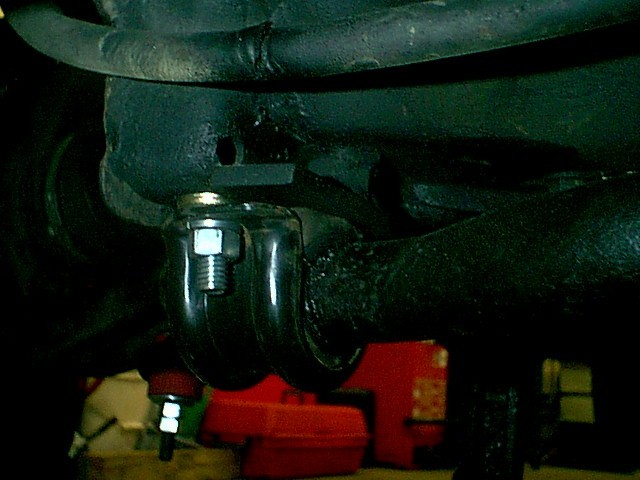
The driver's side mount will need a little help for support which can be accomplished by welding in a piece of metal as shown below. If you don't have access to a welder, then a 3/4" block of metal should suffice. Double check that the chosen spacer will sit flush at the existing plane of the frame for a level mounting surface for the mount. Some type of epoxy or J-B weld can be used to make sure the spacer is positively secured.
Once your holes are drilled, install the bar using the appropriate hardware and make note if any part of the subframe may need to be ground or notched for clearance. In my case, the bar was a little close on each side where the frame was boxed in and I ground some material away from the frame to allow for approx 1/4" clearance. Take care that you don't grind away any factory welds as this could weaken the frame.
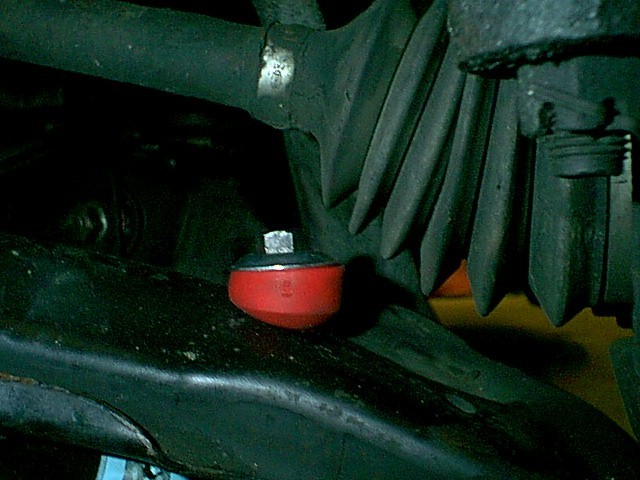
Depending on the type of bushing you have, you may need to install the 3/8" flat washers (2 or 3 per bolt) between the brackets and subframe as shown below. This may be necessary to make sure the bushing is not too tight on the sway bar.
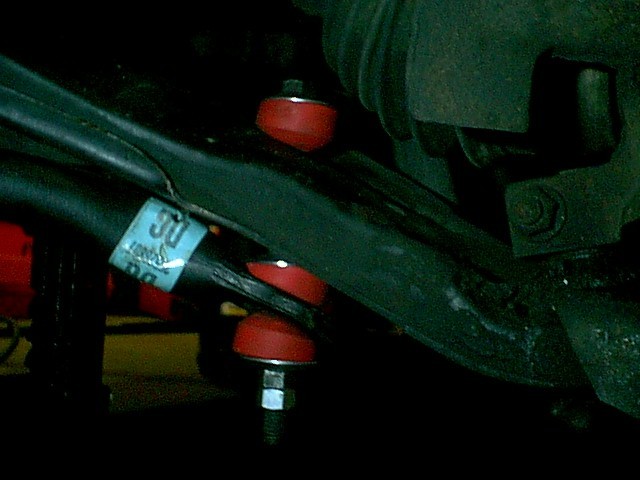
After you are done with the frame mounting aspect of this install, holes will need to be drilled in the lower control arms just rearward of the CV shaft centerline as shown below for the end links. Be sure that the sway bar is centered between the wheels at this time. The marking of the location of these holes should be made after the sway bar is securely mounted in place, centered, and the suspension is fully loaded so that the end links will stand almost vertical. Allow the proper clearance for the components of the end links when marking your holes. (I.E. make sure the sway bar is moved far enough below the control arm so you can fit the end link parts in between)
These holes should be finished to approx. 7/16" in diameter allowing for some lateral movement of the end link bolt which will occur when the suspension moves. Take care that you don't drill into the CV boots which are less than two inches away when the suspension is unloaded.
The finished install should allow the sway bar to not come closer than 1/8" to the control arm or frame at any position of the suspension travel. If you find that your clearances are a little close or far, adjustment in the length of the end link spacer or shimming of the frame mounts can be made to compensate. This install should allow for most exhaust routing schemes, be they are stock or custom. I currently run 2.5" exhaust tubing and have ample room for the sway bar. I strongly recommend that poly lower control arm bushings be installed to maximize handling and prevent control arm deflection under high cornering loads.
Questions? Comments? Feedback? Suggestions? Please email me.