2005 Pontiac Grand Prix GXP LS4 DoD 4T65E TAPShift powertrain swap into a Pontiac Fiero
PAGE 9
The OE exhaust crossover pipe used on this engine is routed very close to the transmission gear shifter shaft and lever; similar to 3800 Series 2 applications. The Pontiac Fiero uses a reverse actuating shifter and cable vs. what is normally found in GM front-drive cars. On the LS4's 4T65-E, the OE shift lever arm faces away from the exhaust crossover pipe. But in the Fiero application, this arrangement will work in reverse due to the inverted shifter workings.
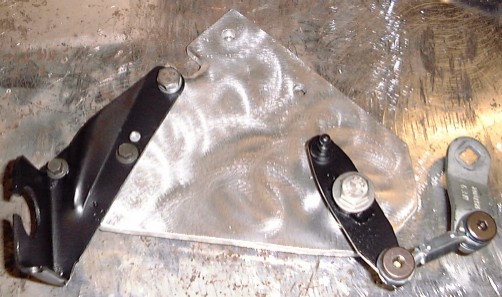
There is not enough room to use a shift lever arm on the opposite side of the shifter shaft (facing the exhaust). The OE Fiero shifter cable is not long enough to loop it around and make it come in behind the shifter shaft so it would work properly with the OE shift arm. So the solution would be to revert the shift cable actuation by building a pivot plate as seen below...
The major components used to build this pivot plate are 5/16" thick aluminum plate, pivot material (I used 3/16" steel), and some items from a local hardware store (as shown below):
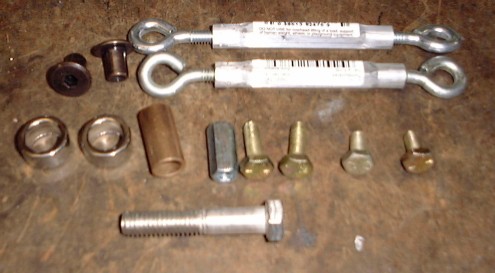
What's pictured above are 2x 1/4" turnbuckles (only used one end out of each turnbuckle; has 1/4-20 thread), 2x 1/2" ID x 3/8" L spacers, 1x 3/8" ID x 1" L brass bushing sleeve, 1x 1/4-20 coupler, 4x 1/4-20 bolts (only needed 2 for my application), 1x 3/8-16 x 2" stainless bolt, and 2x 1/4-20 "end lugs". The end lugs are probably going to be the hardest part to find but my ACE Hardware had them. Basically what they are is a threaded sleeve with a shoulder on one end. It is very important that you get something like this that fits nicely in the end of your turnbuckle eyelets as shown below:
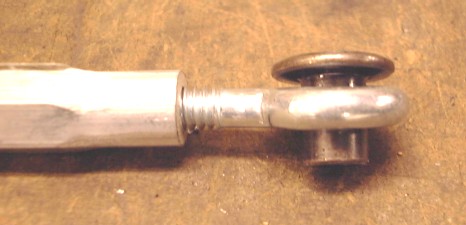
You don't want the lug end fitting tight into the eyelet because it needs to be able to turn in there; but you don't want a lot of slop either. These eyelets aren't welded so I was able to bend them to fit my needs. Make sure you lube up these connections on final assembly to reduce wear. What isn't pictured above is some of the other hardware I had to use assembling this pivot bracket; of which were some 6mm and 8mm bolts used for mounting, some washers used for spacing the pivot arm and eyelet connections, a locking nut used to tighten down the 3/8 stainless bolt used as the pivot shaft, and the shift cable bracket I used for this application.
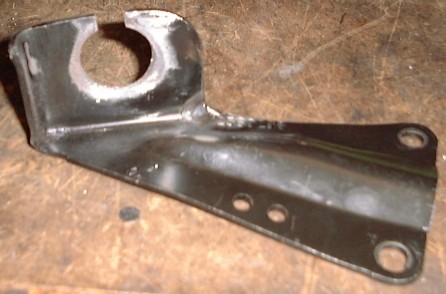
The shift cable bracket I used for this application came from the donor GXP. It's cable opening is too small for the Fiero shifter cable I'm using in this swap which means I had to open up the existing hole to 1" diameter and cut a slot in the top so it matches up to the cable correctly.
Stock:
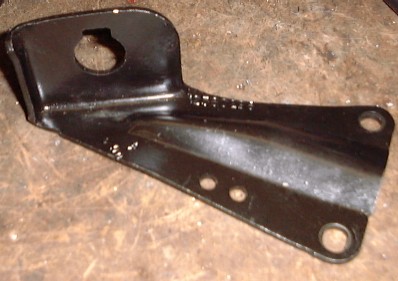
Modified:
When placing the cable bracket and pivot bolt on the baseplate, the key is to keep your geometry of the shifter arm's arc of motion correct so the full range of gear selections can be made. I used the trial and error method of placement using cardboard mock-ups until I found something that worked. Once finished and installed, it looks like this:
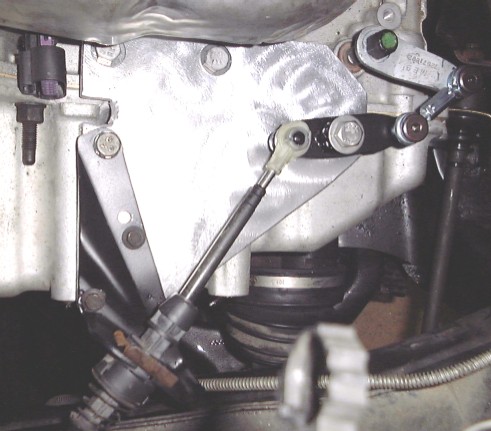
The above design I came up with allows for all ranges of gear selections (P-R-N-D-M) to be accessed using the stock Fiero shifter. I also installed a limiting plate on the Fiero shifter (not shown) to prevent the driver from selecting any gear below the "M" range; which can be done without such a limiter. There are no other lower gear ranges that exist in this TAPShift transmission even though the shifter can be moved there (just will remain in "M" range). So the limiter was installed to prevent shifter movement into those other gear selections.
Swap Page 1 2 3 4 5 6 7 8 9 10 11 12 13